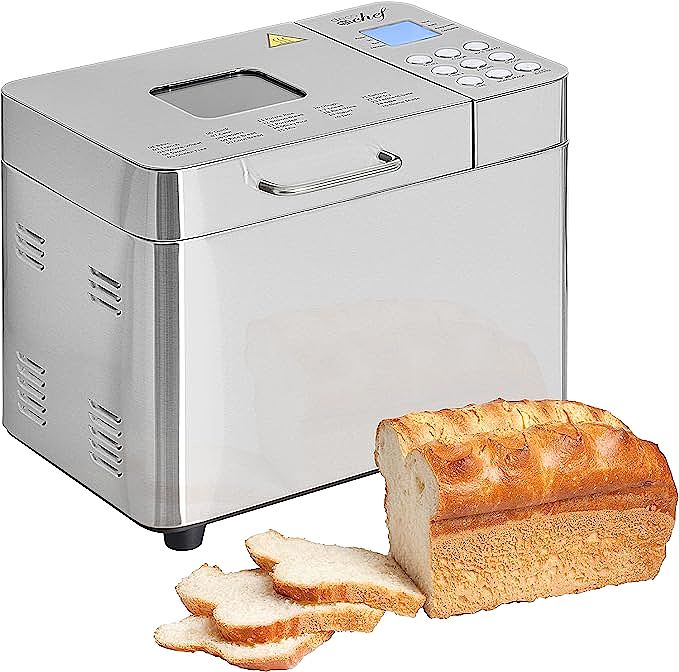
Oster CKSTBR9050 Expressbake Bread Maker: Fresh, Gluten-Free Bread in Under an Hour
Update on March 9, 2025, 5:40 p.m.
The Allure of Homemade Bread: Beyond Taste and Convenience
There’s something undeniably captivating about the aroma of freshly baked bread. It evokes feelings of warmth, comfort, and nostalgia, transporting us back to simpler times. But the appeal of homemade bread extends far beyond its sensory pleasures. In a world of mass-produced food, taking control of our ingredients and crafting something with our own hands offers a sense of satisfaction and connection that’s hard to find elsewhere. Baking bread is an act of creation, a mindful practice that nourishes both body and soul. It is also better for us to have access to healty food.

Unveiling the Magic: The Science Behind Bread Making
At its core, bread making is a beautiful dance of chemistry and biology. Let’s break down the key players:
-
Yeast: The Tiny Alchemist: Yeast, a single-celled fungus, is the driving force behind bread’s rise. It feeds on the sugars present in flour, producing carbon dioxide gas as a byproduct. This gas gets trapped within the dough, creating the airy texture we love. Think of yeast as tiny balloons inflating within your dough.
-
Gluten: The Elastic Network: Gluten, a protein complex formed when wheat flour is mixed with water, provides structure and elasticity to the dough. Imagine it as a network of tiny springs, giving the bread its chewiness and ability to hold its shape. Kneading the dough strengthens this gluten network, allowing it to trap more gas.
-
The Maillard Reaction: The Flavor Creator: This complex chemical reaction, occurring between amino acids and reducing sugars at high temperatures, is responsible for the browning of the bread crust and the development of its characteristic aroma and flavor. It’s the magic that transforms pale dough into a golden-brown, flavorful masterpiece.
-
Starch Gelatinization: During baking, starch granules in the flour absorb water and swell, eventually bursting and forming a gel-like structure. This process contributes to the bread’s crumb structure and texture.
-
Enzymes: Naturally present in flour, enzymes play a crucial role in breaking down starches into simpler sugars, providing food for the yeast.
The Oster CKSTBR9050 Expressbake: Your Partner in Bread Perfection
While the science behind bread making is fascinating, the process can seem daunting to beginners. This is where the Oster CKSTBR9050 Expressbake Bread Maker comes in. This appliance simplifies the bread-making process, making it accessible to everyone, regardless of their baking experience.
Let’s explore its key features:
- Automated Processes: The Oster CKSTBR9050 takes care of the kneading, rising, and baking, eliminating the need for manual labor and precise timing. It’s like having a personal bread-making assistant.
- Pre-programmed Settings: With 13 different settings, including Basic, French, Whole Wheat, Sweet, Quick, Express Bake (1.0 lb and 1.5 lb), Gluten-Free, Dough, Pasta Dough, Jam, Bake, and Cake, this bread maker offers incredible versatility. Each setting is optimized for the specific type of bread or other food being prepared.
- Expressbake Technology: The Expressbake feature is a game-changer for those short on time. It utilizes optimized temperature and mixing cycles to produce a loaf of bread in under an hour. While the texture may be slightly denser than bread made with longer cycles, it’s a fantastic option for busy schedules.
- Gluten-Free Expertise: The dedicated Gluten-Free setting is a boon for individuals with celiac disease or gluten sensitivity. It carefully controls the mixing and rising times to accommodate the unique properties of gluten-free flours.
- Customizable Crust: Three crust color settings (light, medium, and dark) allow you to tailor the bread to your preference. The darkness of the crust is directly related to the extent of the Maillard reaction, influencing the flavor and aroma.
- Delay Timer: The 13-hour delay timer lets you prepare the ingredients in advance and set the machine to start baking at a later time. Imagine waking up to the smell of freshly baked bread!
- User-Friendly Design: The intuitive control panel and large LCD display make the Oster CKSTBR9050 easy to operate, even for beginners.
- Non-Stick Baking Pan: The removable, non-stick baking pan ensures easy bread removal and effortless cleanup.
Mastering the Basics: A Step-by-Step Guide to Classic White Bread
Let’s walk through a basic white bread recipe using the Oster CKSTBR9050:
Ingredients:
- 1 3/8 cups water (room temperature, around 70-80°F, except for Expressbake)
- 2 tablespoons softened butter or margarine
- 4 cups bread flour
- 2 tablespoons sugar
- 2 tablespoons dry milk
- 1 3/4 teaspoons salt
- 2 1/4 teaspoons active dry yeast
Instructions:
- Liquid Base: Carefully measure the water and pour it into the bread pan. Accuracy is key in baking!
- Fat Addition: Add the softened butter or margarine. Fat contributes to the bread’s tenderness and flavor.
- Dry Ingredients (Except Yeast): Measure the bread flour, sugar, dry milk, and salt. Add these to the bread pan, on top of the liquids. It’s important to add the dry ingredients before the yeast to prevent premature activation.
- Yeast’s Nest: Create a small well in the center of the dry ingredients. This will be the yeast’s “nest.”
- The Star of the Show: Carefully measure the active dry yeast and pour it into the well.
- Secure the Pan: Insert the bread pan into the bread maker, ensuring it clicks into place.
- Program Selection: Close the lid and select the “Basic” setting (Menu 1).
- Loaf Size: Choose the 2 lb loaf size.
- Crust Preference: Select your desired crust color (light, medium, or dark).
- Start Baking!: Press the “Start/Stop” button.
The Key to fluffy White Bread
The order of adding ingredients is super important, especially yeast. Here are some tips to remember:
- Always add liquids first.
- Measure the dry ingredients (except yeast) and pour to the bread pan.
- Add yeast last.
- Do not let yeast contact with liquids directly.
Troubleshooting:
- Bread Collapses: Too much liquid or not enough flour. Try reducing the liquid by a tablespoon or adding a tablespoon of flour.
- Bread is Dense: Not enough yeast or old yeast. Check the expiration date on your yeast. You can also try adding a 1/4 teaspoon more yeast.
- Bread is Dry: Too much flour or not enough liquid.
- Bread Not Rising: Using wrong setting, check manual for more details.
Venturing Beyond: Exploring Different Bread Types with Your Oster
The Oster CKSTBR9050 isn’t limited to white bread. Here are some other options:
-
Whole Wheat Bread: Use the “Whole Wheat” setting (Menu 3) for a healthier loaf with a nuttier flavor. Whole wheat flour absorbs more water than white flour, so you may need to adjust the liquid accordingly.
- 1 1/2 cups warm water (105-115°F)
- 2 tablespoons honey or brown sugar
- 2 tablespoons olive oil
- 1 1/2 teaspoons salt
- 4 cups whole wheat bread flour
- 2 1/4 teaspoons active dry yeast
-
French Bread: The “French” setting (Menu 2) creates a loaf with a crispier crust and a lighter, airier interior.
- 1 1/2 cups water
- 1 1/2 tablespoon olive oil
- 1 1/2 teaspoons salt
- 4 cups bread flour
- 1 1/4 teaspoons active dry yeast
-
Sweet Bread: The “Sweet” setting (Menu 4) is designed for breads with higher sugar content, such as cinnamon raisin bread.
- 1 1/4 cups water
- 2 tablespoons butter or margarine
- 1 1/2 teaspoons salt
- 4 cups bread pour
- 3 tablespoons sugar
- 2 tablespoons dry milk
- 1 1/2 teaspoons cinnamon
- 2 1/4 teaspoons active dry yeast
- 1 cup raisins
Gluten-Free Baking: Demystifying the Challenges and Solutions
Gluten-free baking presents unique challenges due to the absence of gluten, the protein that provides structure and elasticity to traditional bread. Gluten-free flours, such as rice flour, tapioca starch, and potato starch, behave differently and require careful handling.
The Oster CKSTBR9050’s “Gluten-Free” setting (Menu 8) addresses these challenges by:
- Adjusting Mixing Times: Gluten-free doughs often require less mixing than wheat-based doughs to prevent them from becoming gummy.
- Controlling Rising Times: Gluten-free doughs may rise more quickly or require a different rising temperature than traditional doughs.
- Optimizing Baking Temperature: The baking temperature may be adjusted to ensure proper browning and prevent the bread from becoming too dry.
Gluten-Free Bread Recipe:
- 1 1/4 cups warm water (105-115°F)
- 2 tablespoons olive oil
- 2 tablespoons honey or sugar
- 1 1/2 teaspoons salt
- 3 cups gluten-free bread flour blend (ensure it contains xanthan gum)
- 2 1/4 teaspoons active dry yeast (or gluten-free bread machine yeast)
Key Ingredient: Xanthan Gum: Xanthan gum is a common ingredient in gluten-free baking. It acts as a binder and stabilizer, mimicking some of the properties of gluten.

More Than Just Bread: Unleashing the Versatility of Your Oster
The Oster CKSTBR9050 is more than just a bread maker; it’s a versatile kitchen appliance.
- Dough Setting (Menu 9): This setting prepares the dough for you, handling the kneading and first rise. You can then shape the dough into rolls, pizza crust, or other creations and bake them in your conventional oven. This is perfect for those who enjoy the hands-on aspect of shaping dough but want to skip the tedious kneading process.
- Pasta Dough Setting (Menu 10): Use this setting to make fresh pasta.
- Jam Setting (Menu 11): The jam setting simplifies the process of making homemade jams and preserves. The constant stirring and controlled heat prevent scorching and ensure a smooth consistency.
- Cake Setting (Menu 13): This setting is designed for quick breads (those without yeast), such as banana bread or pound cake. It provides the appropriate mixing and baking time for these types of batters.

The Art of Bread Making: Tips and Tricks for Success
- Ingredient Temperature: For most recipes (except Expressbake), use room-temperature ingredients (around 70-80°F). For Expressbake recipes, use warm water (115-125°F).
- Accurate Measurement: Use measuring cups and spoons correctly. Level off dry ingredients with a straight edge. For liquids, use a clear measuring cup and check the level at eye level.
- Yeast Freshness: Check the expiration date on your yeast. To test yeast activity, dissolve a teaspoon of sugar in 1/2 cup of warm water (105-115°F). Add the yeast and let it sit for 5-10 minutes. If it becomes foamy, the yeast is active.
- Don’t Overcrowd: Don’t exceed the recommended loaf size for your bread maker.
- Removing the Kneading Blade: If the kneading blade gets stuck in the loaf, use the included tool (or a non-metal utensil) to remove it carefully after the bread has cooled slightly. Before inverting the pan, run a spatula or plastic knife around the inside edges to help loosen the loaf.
- Cooling and Storage: Allow the bread to cool completely on a wire rack before slicing and storing. Store bread in a breadbox or airtight container at room temperature.
Bread Through the Ages: A Cultural and Historical Journey
Bread has been a staple food for millennia, playing a central role in various cultures and religions. From the ancient Egyptians, who used emmer wheat to bake loaves, to the Romans, who developed sophisticated milling and baking techniques, bread has been a symbol of sustenance, community, and even spirituality. Different cultures have developed unique bread-making traditions, resulting in a vast array of bread types, each with its own distinct flavor, texture, and cultural significance.

Conclusion: Embracing the Joy of Homemade Bread
The Oster CKSTBR9050 Expressbake Bread Maker empowers you to experience the satisfaction and joy of baking your own bread, regardless of your skill level or dietary needs. It’s a tool that simplifies the process, unlocks culinary creativity, and connects us to a timeless tradition. By understanding the science behind bread making and utilizing the features of this versatile appliance, you can create delicious, healthy, and personalized loaves that nourish both body and soul. So, go ahead, embrace the aroma, the taste, and the magic of homemade bread.